Install Adobe CC (MacOS)
On this page you will learn how to install Adobe Creative Cloud on MacOS devices.

Instructions
License
To be able to use licensed software such as Office 365 or Adobe, you must first book the corresponding licenses. You can find instructions on how to book licenses here.
Download Adobe Creative Cloud
To download Adobe Creative Cloud, follow the link that you can also find in the email from Adobe.
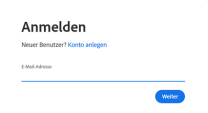
In the first login window, simply enter uni-siegen.de.
You will then be redirected to a ZIMT page. Log in there with your ZIMT account.

If you need to select a license, select the license "LRZ University of Siegen".
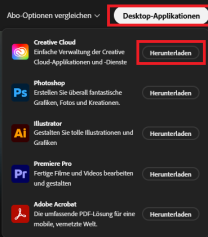
Once you have successfully logged in, your Adobe start page will be displayed. Click on"Desktop Applications" and then on"Download" next to the Creative Cloud to start the download. You can also download individual applications available in your subscription in this way.
You can then find the setup file in your download directory.
Installation
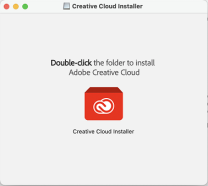
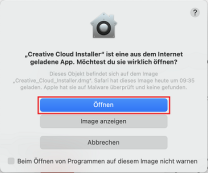
If you now double-click on the setup file under your downloads, a folder will open from which you can open the Adobe installation program.
You must now allow the installation. To do this, confirm the dialog box with "Open".
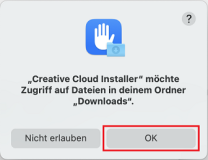
The Creative Cloud also requires access to your files. Confirm this dialog box with "OK" as well.
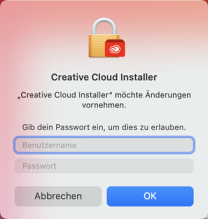
The installation starts automatically after you have entered your device password.
Adobe will ask you questions during the installation. These are optional and can be skipped.

All apps that are available in your subscription are displayed on your dashboard. Select the app you want to install and click on "Install".

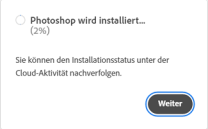
Once the installation is complete, click on "Next".